Onboarding users on Falcon ID
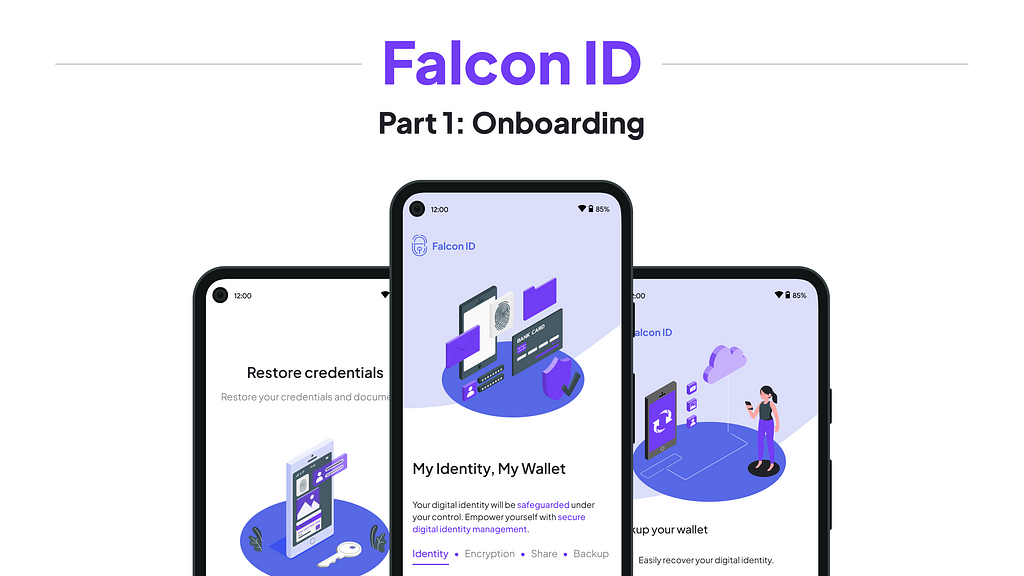 Banner image
This is a freelance project, done in a span of six weeks. This is the first half of a two-part case study about designing a 0–1 decentralised ID wallet.
What is the product?A Decentralised ID wallet is like DigiLocker, an app where all your documents (birth certificate, mark sheets, college ID, National IDs like Aadhaar, PAN, Driving License, Property documents etc.) can be stored digitally as a decentralised ledger. Users have control over who they want to share their IDs with and the schema (information bits from the ID) they want to share.
Web3 applications for blockchain technology — like Crypto, NFTs, games, IDs — are not trusted by the masses; only a minority of the population has adopted these applications. This was a problem we had to tackle during user onboarding by creating complete transparency so that users could trust the app.
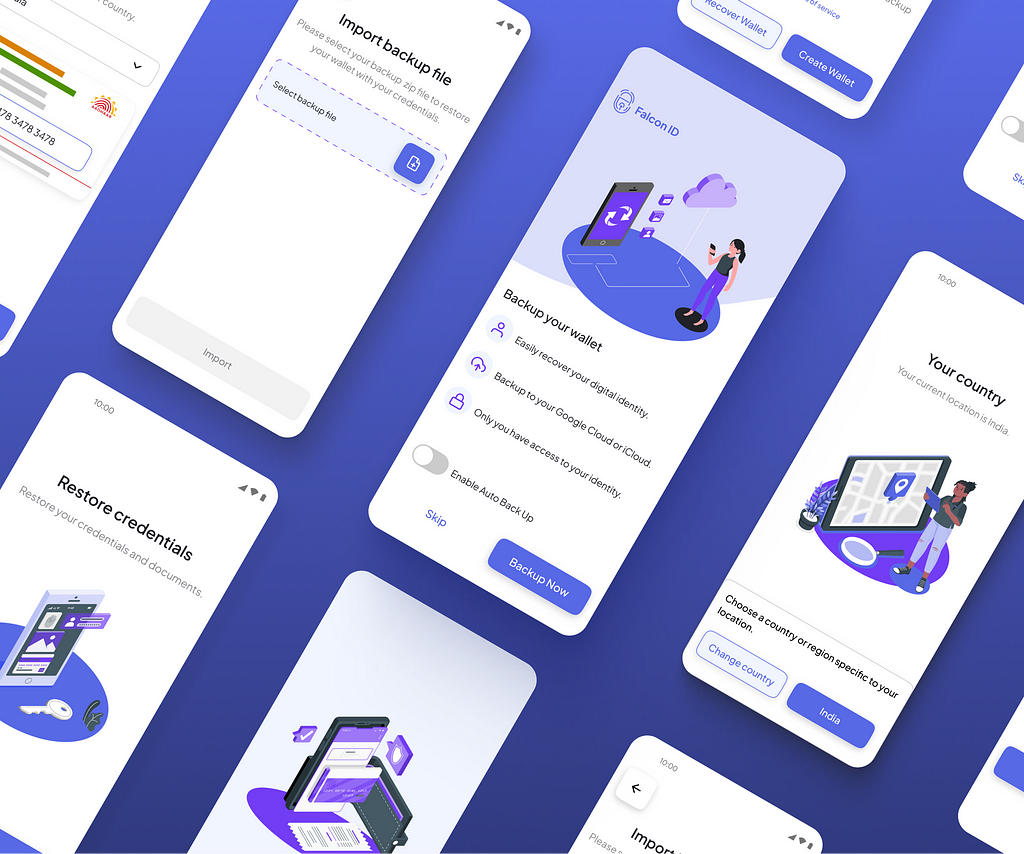 Banner: Preview of the screensUser Personas
While talking with the team, the age group mentioned to us was 15–80 years old.

This age group initially seemed too vast to design for. As I gained a deeper understanding of the product, its use cases and some of the goals, I was able to narrow down to a better suited age group.
People above the age of 50 sometimes face problems in using their laptops and mobile phones, or can even get confused with certain app updates. Web-3 products are “too new” for this cohort to adopt, understand and use.The team decided to focus on users in the age group 18 to 40 years old.
We used Notionsmith (AI Persona generator) to create multiple personas and identify some pain points with existing apps. This acted as a reference point for us to create personas that were better aligned to our target users.
 Personas generated by Notionsmith
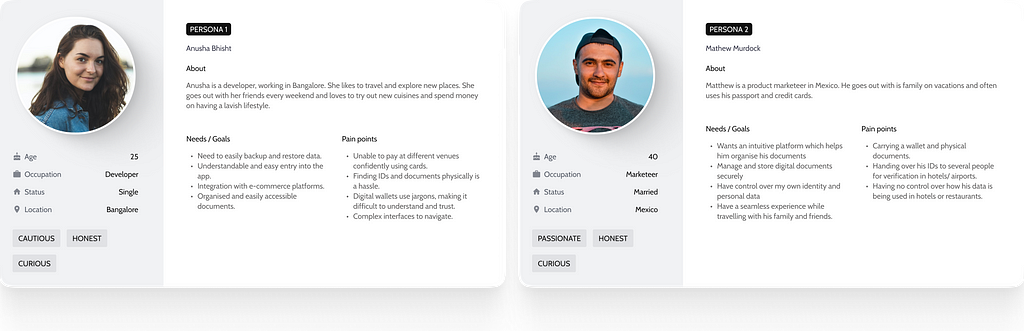 User personasCompetitor Analysis
We analysed a few competitors for permutations and combinations of steps users could take to create a new wallet or recover their wallet in case they are logged out.
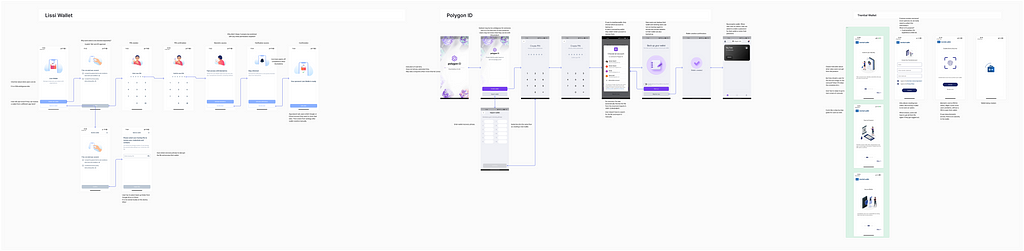 Competitor analysisUser Flow
We iterated a few flows after our research.
Since this is an international product, the user flows would undergo a slight change as per each country’s policies. We designed 2 onboarding flows: One with an eKYC and one without an eKYC. To make the onboarding more developer friendly, we ensured that we were not designing drastically different flows.
Overall, to ensure simplicity, we designed a simple, 3-part onboarding.
 User flow structure
We realised that users had to be educated about how this app would empower them and why they need this app.
Since some apps did not allow backing up of wallet in the onboarding, users may not even be aware that they could backup their wallet. We decided to add that as a step in the onboarding. Being transparent allows us to build a user’s trust in the app.
After multiple iterations, this was the flow that seemed to be the most appropriate and usable.
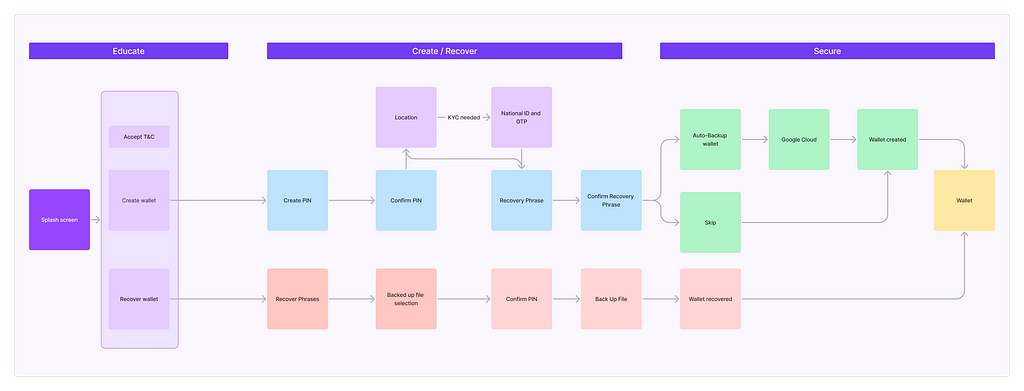 User flow diagram
Note: Different colours represent different micro-services / functions within the flow.
Style Guide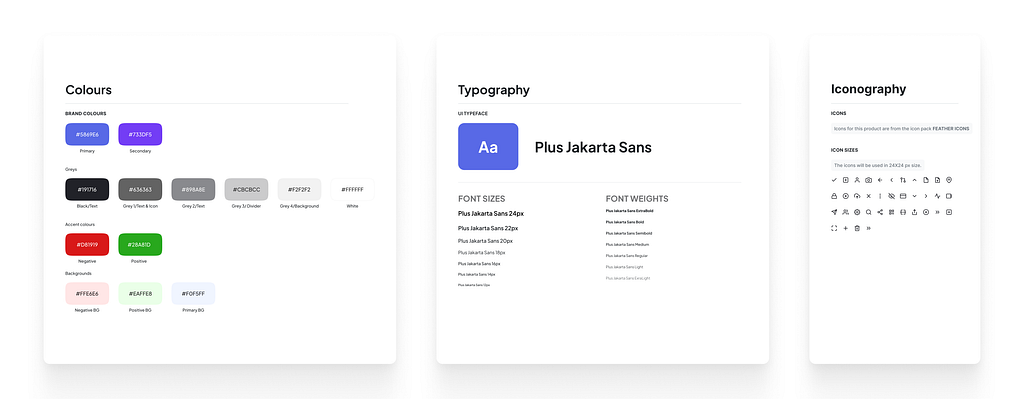 Style guide
We created a simple style guide and design system which would grow with the product’s future updates.
 Wireframes
 Wireframes sketchesThe Designs
 Splash screenWallet creation flow
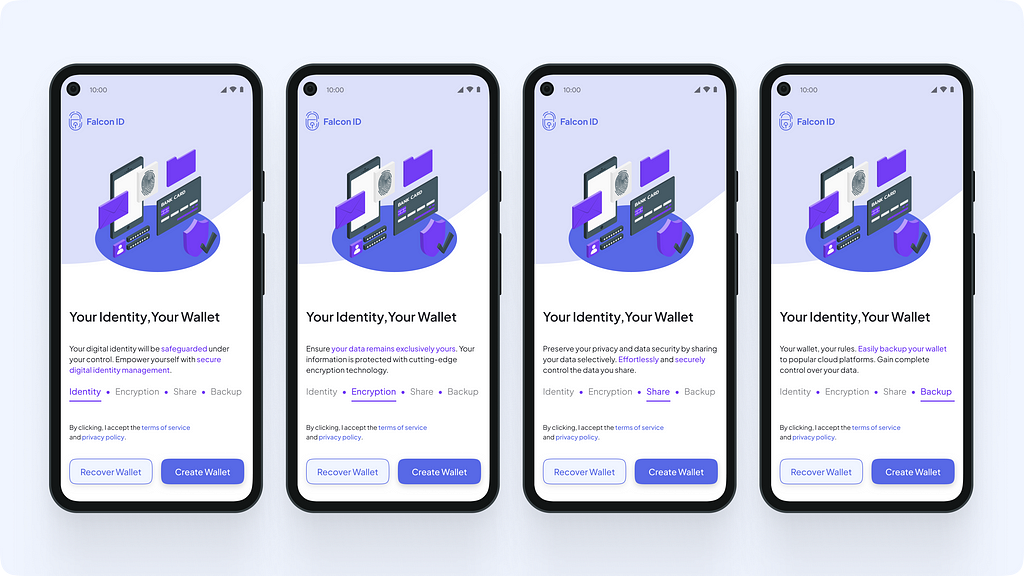 Onboarding: Step 1
Value proposition and features: At the very beginning, we communicate to the user what the main functions of the app are and educate them about how it empowers them. This was to ensure that the users understand that the data on this app is secured, not shared with anybody without explicit consent, and all these functions are completely controlled by the user.
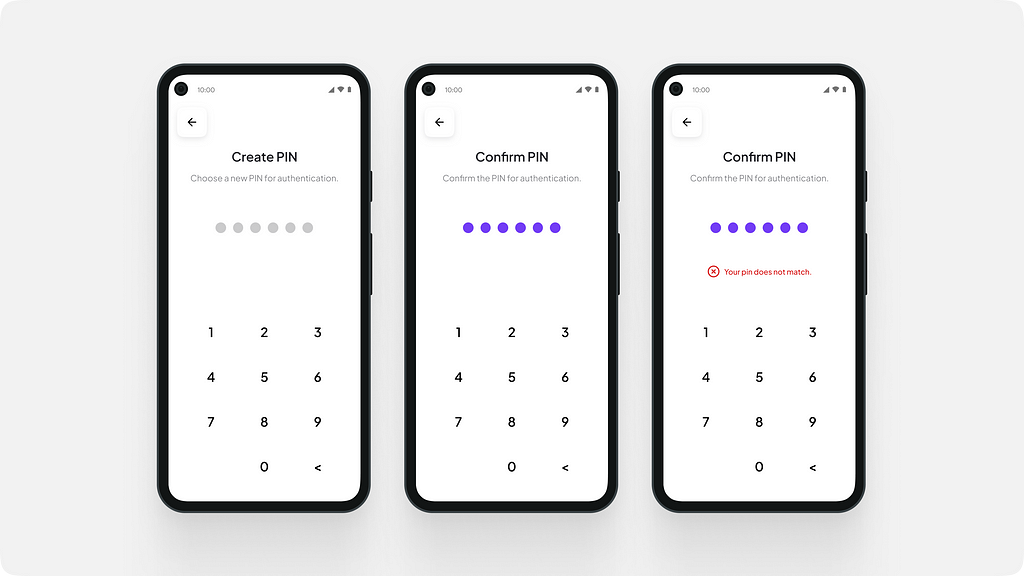 Creating and confirming the wallet PIN.
User creates a 6 digit PIN to secure their wallet.
The eKYC flow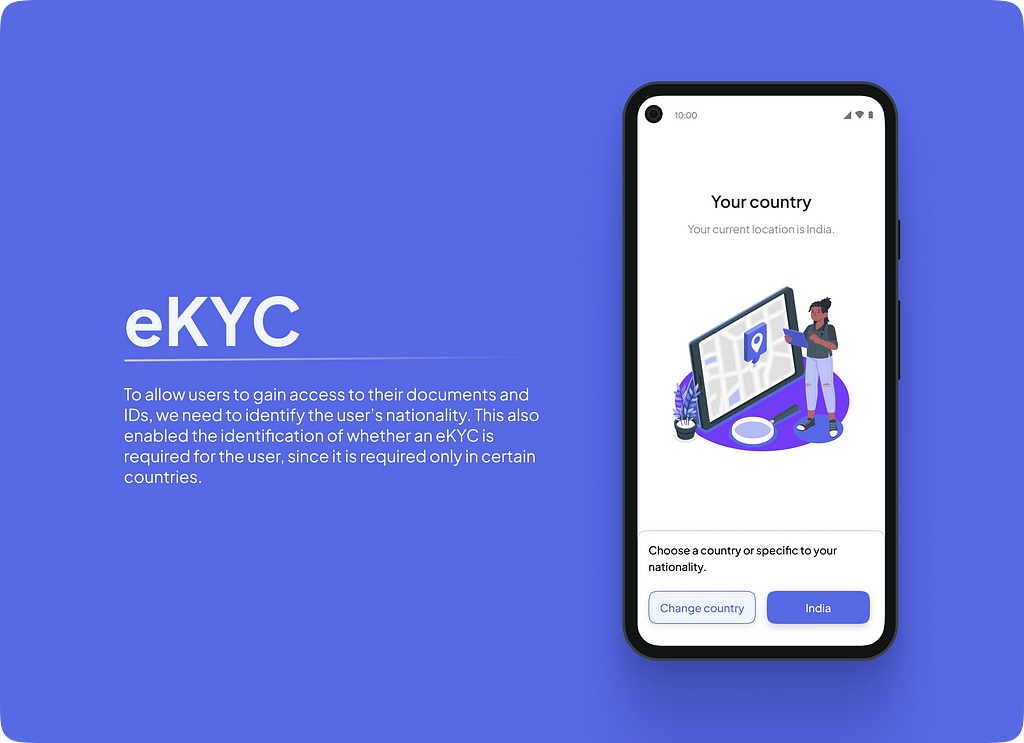 eKYC
eKYCTo allow users to gain access to their documents and IDs, we need to identify the user’s nationality. This also enabled the identification of whether an eKYC is required for the user, since it is required only in certain countries.
 eKYC verification
To make the eKYC slightly more interactive we designed a template for Aadhaar card. This would be replicated to other templates as well for the respective countries. We provided a dropdown to change the country, in case the user clicked the button by mistake.
The idea was to try to showcase that the verification is happening with their ID, which belongs to them and not just against a number.With an eKYC, personal information like name and phone number would automatically be fetched.
Onboarding without eKYC Onboarding withour eKYC.
 Personal information entry
If the user is not required to do an eKYC, they would have to enter their name and phone number to create a wallet.
Securing the wallet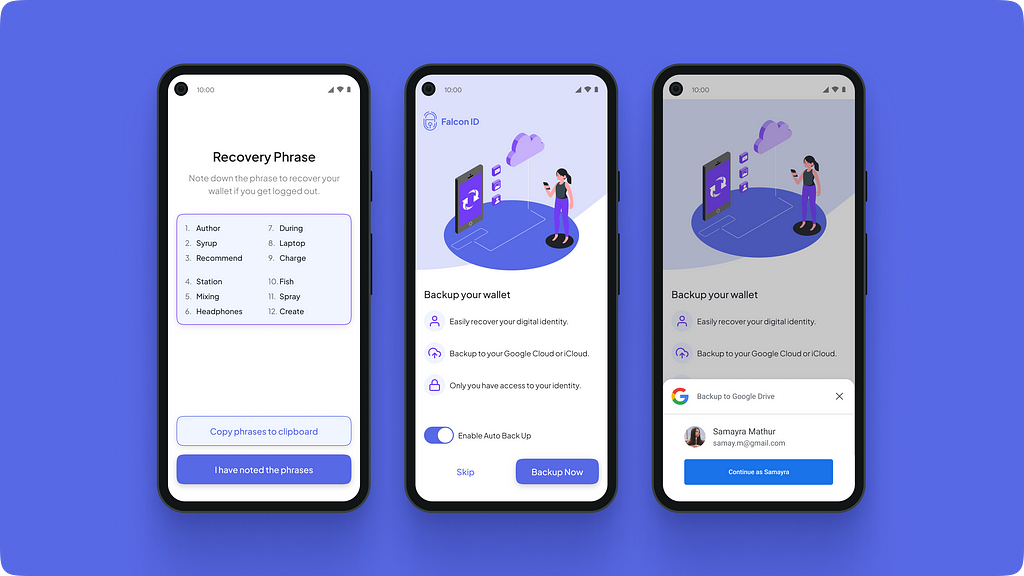
The recovery phrase is the most important part for a user to recover their wallet .The user needs to maintain either a digital or a physical copy of the recovery phrase. Hence, we provided a “Copy phrases to clipboard” CTA to make it easy to copy and paste the phrase at once.
The CTA “I have noted the phrase” lets the user proceed to the final step of the onboarding (backup).
The user has an option to backup their wallet to their Google drive. They can turn on auto backup to ensure any new IDs that are added to their wallet are backed up automatically.
 Animation while new wallet is being created.
To let the user know that their wallet is being created and setup, we designed a screen with a small and very basic animation sequence. The concept was to show that the wallet is being created and everything is coming together piece by piece.
Wallet recovery flow Step 1: Wallet recovery
To recover the wallet, the user has to select the Google account where the encrypted file of their wallet is backed up.
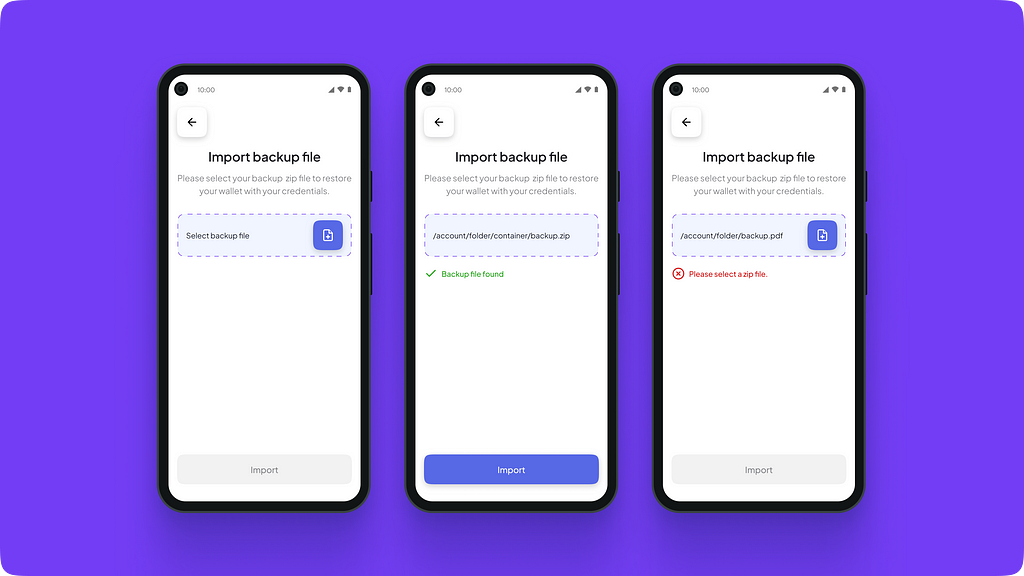 Fetching the backed-up file
After the file has been retrieved, the app automatically verifies the file format and the data to verify if the correct file has been fetched.
 Unlocking the wallet with recovery phrase.
To decrypt the file and access the wallet, the user needs to enter the recovery phrase. This acts as the key to the data in the file and ensures that only the owner of the wallet can access it. This is useful if the user is logged out or if the user has changed their mobile phone.

To secure their wallet, the user needs to create a new PIN, ensuring that only they can access the wallet.
We added a step to gain explicit consent to restore their wallet. This step also helped us ensure that users were not startled that their wallet was being restored automatically after they created a new PIN. This step allows the user to be in complete control of their wallet.
Sometimes, the user may enter the wrong phrase or a spelling mistake. Sometimes the file may have been corrupted. We designed an error state for such situations, showcasing that the wallet cannot be recovered. Animation while the wallet is being recovered.
This project was made possible with the help of Kenneth Bhasme, who’s collaboration and support made it possible to hand over the designs as per expectations and timeline. ([email protected])
Part 2 of Case Study:
Onboarding users on Falcon ID was originally published in Coinmonks on Medium, where people are continuing the conversation by highlighting and responding to this story.