20 insanely useful Windows 11 keyboard shortcuts I use every day
As a long-time Windows geek, I’ve always loved and relied on keyboard shortcuts. They’re incredible! Like a collection of secret handshakes that can quickly perform useful tasks and dramatically speed up whatever you’re doing on your computer.
Get Windows 11 Pro for cheap Windows 11 Pro Price When Reviewed:
199.99
Best Prices Today:
$59 at PCWorld Store – Win 11 Pro Upgrade Only |
$79.99 at PCWorld Software Store
And yes, keyboard shortcuts are rather secret. Windows doesn’t provide a coach that guides you through the hundreds of keyboard shortcuts you might find handy. They’re just… there. In the background.
So, you usually have to seek them out or find out about them the old-fashioned way: by talking with other PC geeks and reading helpful articles like this one. Let me show you the greatest and most practical keyboard shortcuts I actually use all the time.
1. Launch File ExplorerIf you’re like me, you use File Explorer a lot. With a keyboard shortcut, it’s always close at hand — simply press Windows key + E to launch a new File Explorer window whenever you need one.
2. Go straight to Task ManagerYou probably know the basic Ctrl + Alt + Delete keyboard shortcut, but if you’re using it to open Task Manager, there’s actually a better way: instead, use the Ctrl + Shift + Esc keyboard shortcut.
3. Open the Settings appWant to change a setting in the operating system? You usually have to do it through the Settings app. Instead of searching the Start menu, there’s actually a keyboard shortcut you can use: Windows key + I. Then, you can search directly in the Settings app for what you need.
4. Dig through clipboard history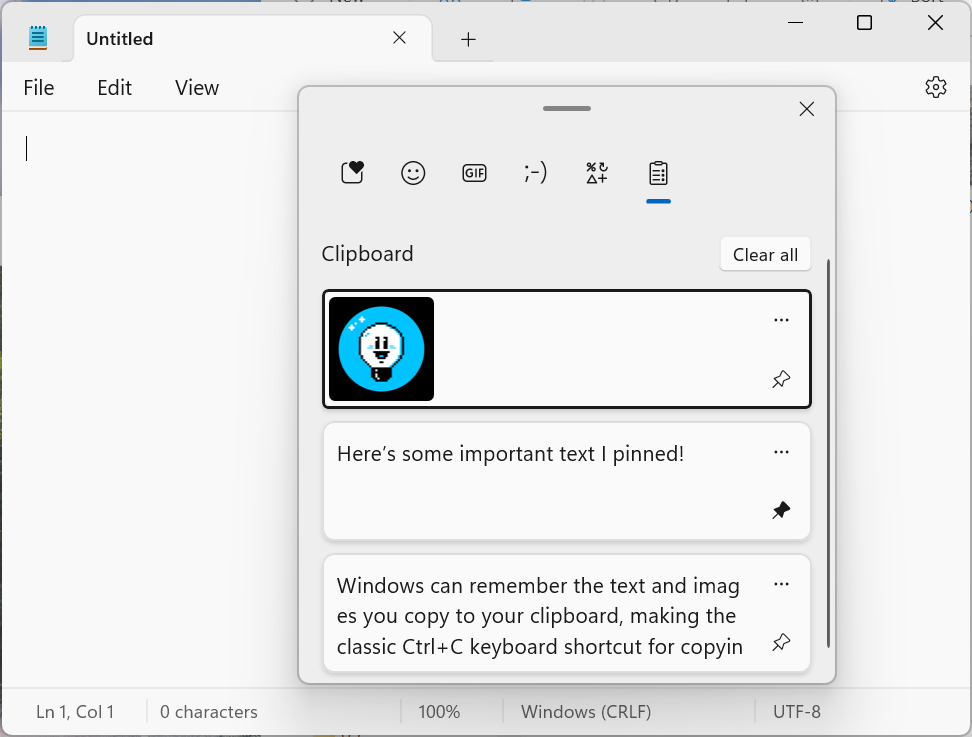

Chris Hoffman / IDG

Chris Hoffman / IDG
Chris Hoffman / IDG
Did you know that every time you copy an image or text to the clipboard, Windows keeps a running history of it all? The usual Ctrl + V keyboard shortcut only pastes the last thing you copied — but if you want to paste something you copied much earlier, you can!
All you have to do is pull up the clipboard history with the Windows key + V keyboard shortcut. (If you’ve never opened it before, you’ll be prompted for permission to activate the feature.)
What’s nice about the clipboard history is that you can even pin certain copied items to the panel, making them quick to find in the future.
5. Insert emojis anywhere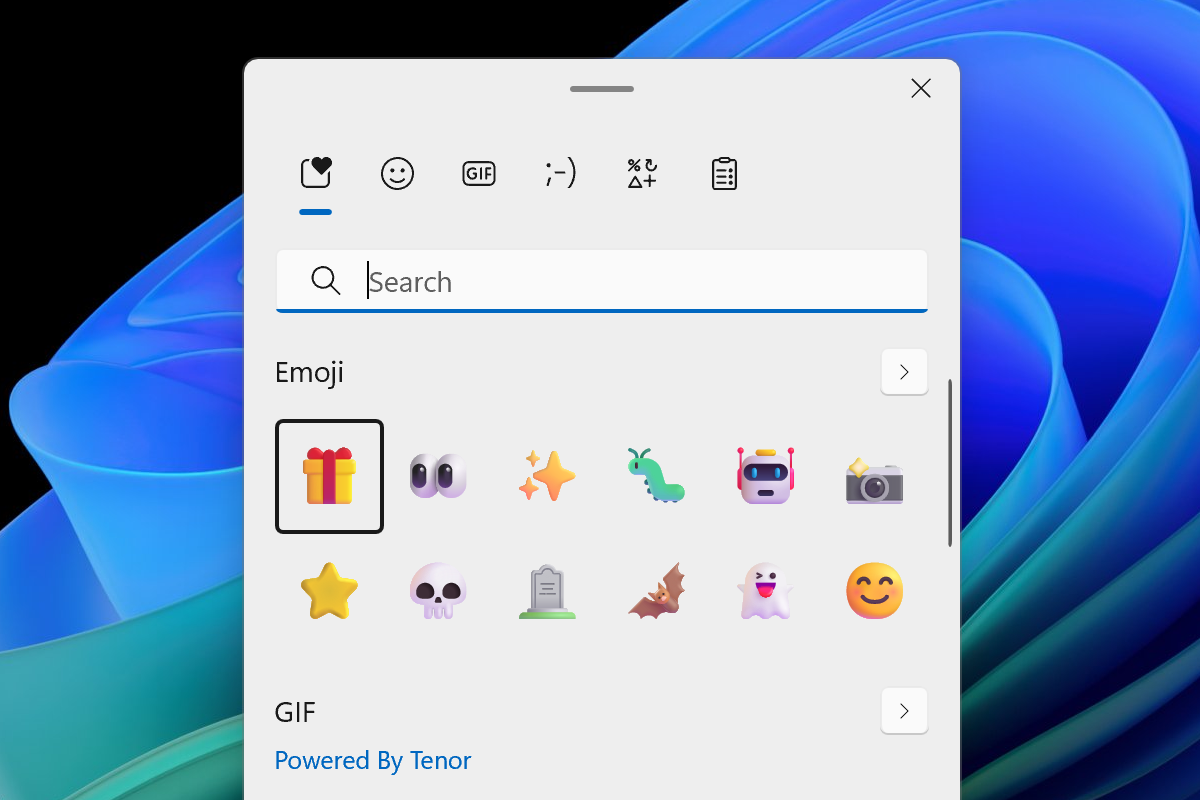

Chris Hoffman / IDG

Chris Hoffman / IDG
Chris Hoffman / IDG
Love ’em or hate ’em, emojis have become part of modern communication — and Microsoft knows this, which is why Windows makes it easy to input emojis in nearly any application.
All you have to do is press the Windows key + Period or Windows key + Semicolon keyboard shortcuts. Then, use the search field to find the emoji you want (or just scroll through to browse).
6. Type with your voice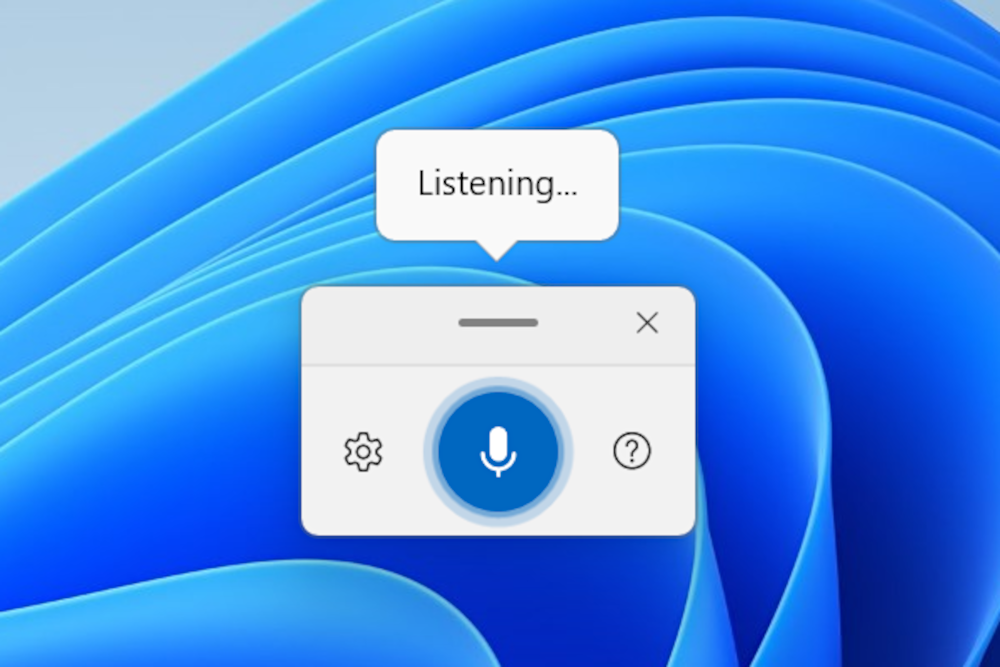

Chris Hoffman / IDG

Chris Hoffman / IDG
Chris Hoffman / IDG
Windows lets you input text with your voice in nearly any application. To pull up the voice typing interface, just press Windows key + H. You’ll see a floating window (on Windows 11) or a bar (on Windows 10).
This feature is called Voice Typing. You can use the settings menu in the window/bar to activate features like automatic punctuation. (By default, you’ll have to speak words like “period” while you dictate text.)
7. Discover the power user menuWhen Microsoft got rid of the Start menu in Windows 8, they at least had the courtesy to throw a bone to power users: a hidden “power user menu” with quick access to various system settings.
And even though Windows 10 brought back the Start menu — which persists into Windows 11 — the power user menu never went away. To open it, press Windows key + X (or right-click the Start button).
8. Lock your computerTo protect your computer from unauthorized access — especially in an environment like an office or campus — you should lock your computer whenever you step away. To quickly lock your PC, simply press the Windows key + L keyboard shortcut.
9. Control sound settings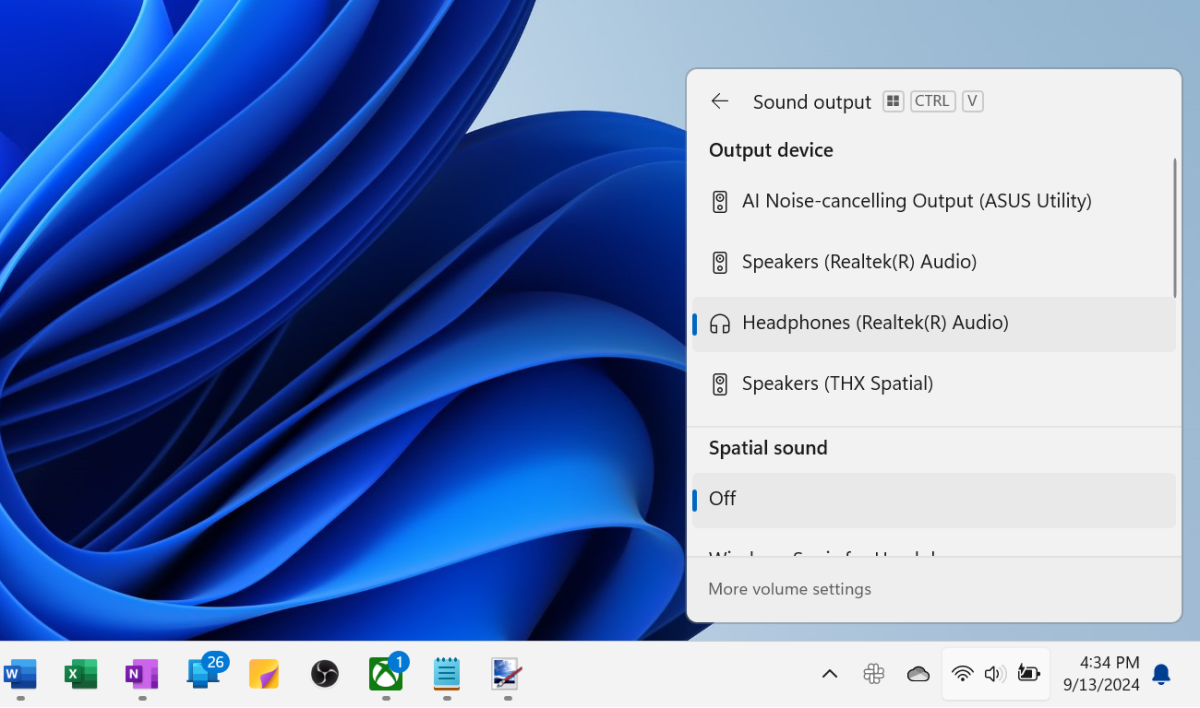

Chris Hoffman / IDG

Chris Hoffman / IDG
Chris Hoffman / IDG
If you have multiple sound output devices (e.g., speakers, headphones, wireless earbuds) or multiple sound input devices (e.g., laptop microphone, headset, external microphone), you probably switch between them a lot.
Well, you don’t have to dig deep into the Settings app to change between them. You can actually just press the Ctrl + Windows key + V keyboard shortcut to pull up the sound settings menu.
It’s also a shortcut to adjusting system volume and per-app volume (using the sliders) and a quick way to pop into the Sound section of the Settings app (by clicking More volume settings).
This feature is new to Windows 11, so isn’t available on Windows 10.
10. Snap windowsThe Snap feature is an essential window management tool for multitasking on Windows 11. You can easily “snap” app windows to edges of the screen using your keyboard.
For starters, use Windows key + Left arrow and Windows key + Right arrow to snap the currently focused window to either the left half or right half of the screen. Similarly, use Windows key + Alt + Up arrow and Windows key + Alt + Down arrow to snap windows to the top half or bottom half of the screen, respectively.
You can also use shortcuts to move windows to quadrants of the screen. For example, after snapping a window to the left half (using the above keyboard shortcut), keep holding the Windows key and tap the Up arrow to snap it to the top-left quadrant.
11. Activate Snap Layouts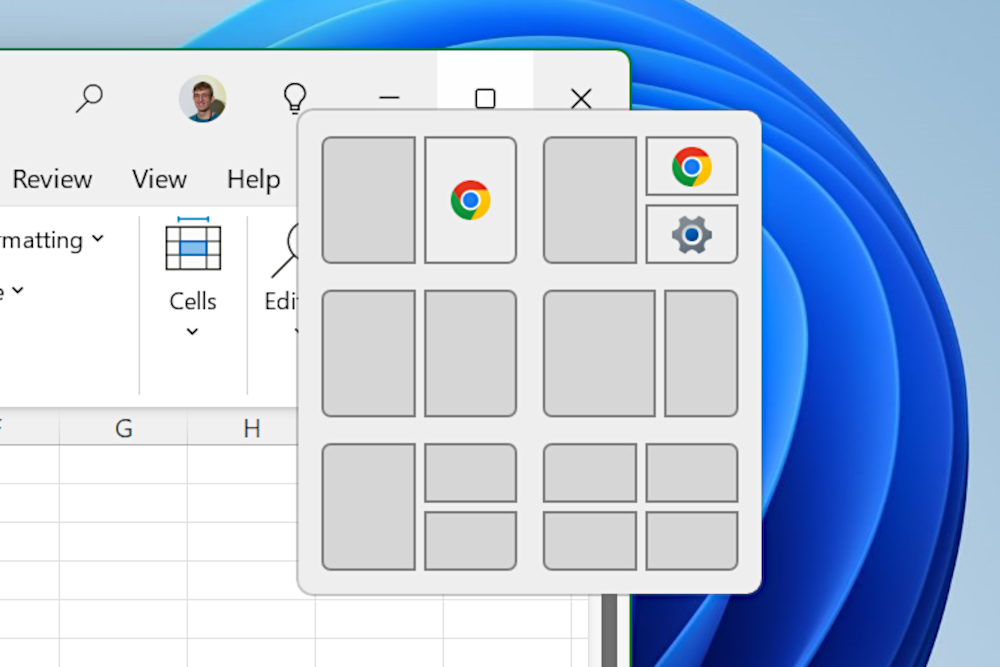

Chris Hoffman / IDG

Chris Hoffman / IDG
Chris Hoffman / IDG
As if Snapping itself wasn’t useful enough, Windows 11 also has an additional Snap Layouts feature that makes it easier to snap windows into various configurations.
To activate Snap Layouts, use the Windows key + Z keyboard shortcut. You’ll get a pop-up with numbered options — simply press the associated number key to choose that window layout.
You can also see Snap Layouts by hovering your mouse pointer over the Maximize button of a window. Or, drag any window to the center-top edge of the screen to see Snap Layout options.
12. Toggle between windowed and full-screen modes in PC gamesMany PC games offer both windowed and full-screen modes. If you want to switch between them, it can be quite a hassle to navigate to the game’s settings menu, especially if you do it often.
Here’s a faster way to switch between windowed and full-screen modes in many PC games: just press Alt + Enter. This doesn’t work in every game, but it does work in many of them. It’s the first thing I try whenever I want to switch between full-screen and windowed modes.
13. Jump between virtual desktopsWindows 11 has a feature called Task View that lets you create “virtual desktops” that you can switch between. A virtual desktop is like a separate instance of “the” desktop, and each virtual desktop can hold its own set of running app windows.
There are several keyboard shortcuts for the Task View experience, such as Windows key + Tab, which makes it easy to create new virtual desktops, delete existing ones, and jump between them.
But once you’ve created a few virtual desktops, an even easier way to switch between them is to use the Windows key + Ctrl + Left arrow and Windows key + Ctrl + Right arrow keyboard shortcuts.
14. Move windows between monitorsDo you have a sprawling workstation setup with multiple monitors? You can move windows from one screen to the next by pressing Windows key + Shift + Left arrow (to move the currently focused window to the left display) or Windows key + Shift + Right arrow (to move the currently focused window to the right display).
15. Open the classic File Explorer context menu right awayOn Windows 11, File Explorer has changed a lot from what it was before, particularly with a streamlined context menu. But some options are only found in that classic, old-school context menu.
Rather than first opening the context menu and then selecting Show more options (or even hacking your registry with a workaround), you can actually just use a keyboard shortcut to quickly open the old context menu right away: hold down the Shift key while right-clicking in File Explorer to see the classic context menu.
This feature is new to Windows 11, so isn’t available on Windows 10.
16. Edit text fasterThe Ctrl key is one of my favorite underutilized tricks when it comes to fast text editing. In short, holding down Ctrl makes most keys act on entire words rather than individual characters.
For example, Backspace deletes the previous character, but Ctrl + Backspace deletes the previous word. Another example, Left and Right arrows move the cursor by one character, but Ctrl + Left arrow and Ctrl + Right arrow moves the cursor from word to word.
And it works with the Shift key, too. By holding Shift, you can highlight text as the cursor moves — so, if you want to quickly highlight multiple words in a row, just hold Ctrl + Shift and then tap the Left and Right arrows. (Try holding Shift with the Home and End keys to highlight entire lines of text with just a few keystrokes!)
17. Reopen a closed browser tabAll the modern web browsers — including Chrome, Firefox, Opera, and Edge — let you quickly reopen tabs that you’ve closed. It’s easy to remember, too: if the Ctrl + T keyboard shortcut creates a new tab, the Ctrl + Shift + T keyboard shortcut reopens the last closed tab.
18. Alt + Tab in reverseAlt + Tab is one of the most iconic Windows keyboard shortcuts. But, if you have a lot of open windows to cycle through, it may make more sense to cycle in reverse sometimes. In that case, just press Shift + Alt + Tab to go backwards through the list of open windows.
And that’s not all: while the Alt + Tab dialog is open, you can also use the arrow keys to instantly jump to the selected thumbnail’s window.
19. Rename files quicklyWant to quickly rename a file? With a file selected in File Explorer, just press F2, type the name, and press Enter.
I like to navigate between files using the arrow keys, then use the F2 key to quickly rename them. Or better yet: after pressing F2 and typing a file name, press the Tab key (instead of the Enter key) to immediately start renaming the next file in the folder.
20. Save a screenshot as a file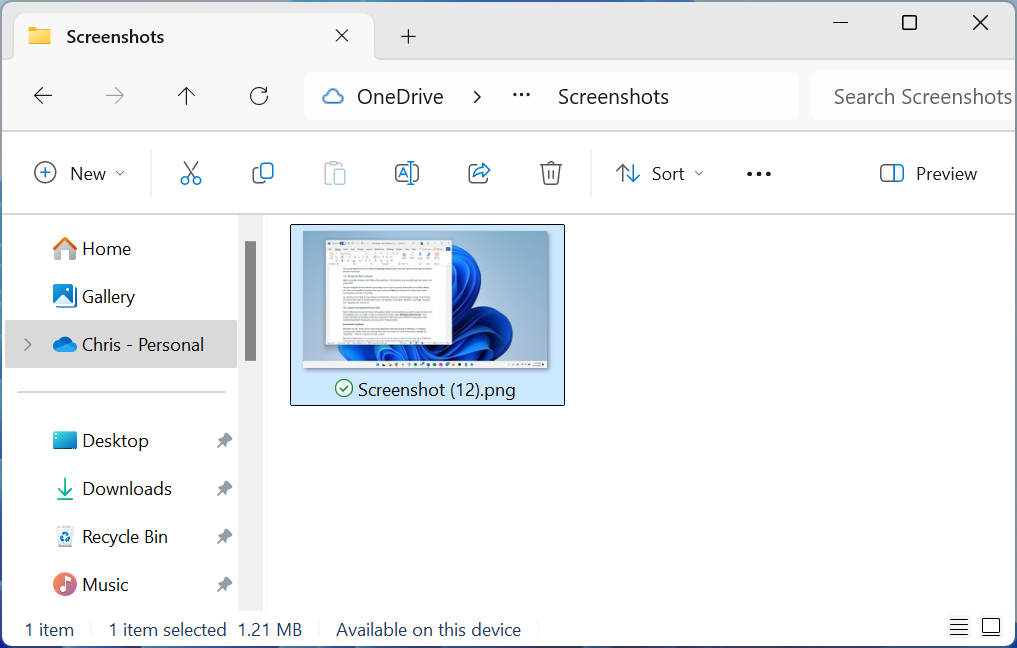

Chris Hoffman / IDG

Chris Hoffman / IDG
Chris Hoffman / IDG
The built-in Windows screenshot tools have gotten better, but sometimes you want to skip the tools and immediately save as an image file.
To save a screenshot to disk without all the intermediate steps, press Windows key + Print Screen. Your screen will flash as Windows saves the screenshot. After that, you’ll find the screenshot in the Screenshots folder inside your user account’s Pictures folder.
More Windows productivity tipsHonestly, as useful as these keyboard shortcuts are, they’re only scratching the surface of what’s buried in Windows. I’m always hunting down useful tips and features to share with the readers of my free Windows Intelligence newsletter!
Be sure to check out this unusually hidden shortcut that works in the Task Manager, too. It blew my mind last year. Even for a grizzled PC geek like myself, there’s always more to discover in Windows.
